








Introduction,
The first deck I ever stained looked fantastic for about three weeks. I’d spent an entire Saturday on it, proud of the rich cedar tone, and I even took photos for my brother. Then a summer storm rolled through, and the stain started peeling in long, ugly strips, like a bad sunburn.
I had skipped the cleaning, ignored the weather forecast, and slapped on a thick coat because “more is better.” It wasn’t. That mistake cost me a whole weekend of sanding to fix.
Since then I’ve stained several decks, my own and a few for friends and neighbors. This guide covers what I learned the hard way, so you can skip the peeling-stain phase entirely.
Why Deck Staining Goes Wrong
Most failed stain jobs aren’t about the product. They’re about preparation. People assume staining is like painting a wall, where you roll it on and you’re done. Wood does not work that way.
A deck live outside it take a beating. Rain absorb it sun bake and foot traffic damage it gradually. Wood also Expand and contract as moisture level change that movement hard on any finish.
Good stain soak into wood fibers and protect from inside. If the surface is unclean damp already sealed with old product stain can not penetrate. It just sit on top and eventually flake off.
So real secret is that staining about 70 percent prep 30 percent application. Keep that ratio in mind because tip below lean heavily on prep.
Tip 1: Get the Timing Weather Right
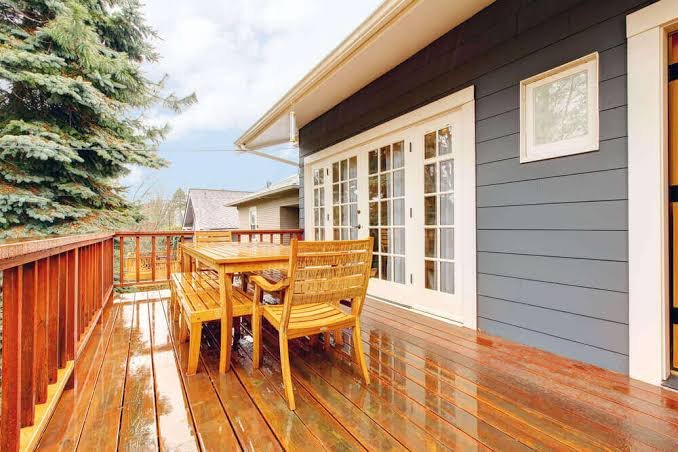
Weather is the thing most people underestimate. You can do everything perfectly still ruin job.
Aim for temperature roughly 50°F and 90°F 10°C to 32°C and check product labels since each stain it own range. Avoid staining in direct scorchings sun. The surface dries too fast the stain doesn’t soak in, and you get ugly lap marks where one section dried before you blended it.
Also avoid days with rain in forecast. Most stain need at least 24 hours and often 48, before water touch them. I like to check the forecast for three days ahead before I even open the can.
Here’s what an ideal staining day looks like:
- Mild temperature, no extreme heat or cold
- Overcast or shaded conditions, or at least no harsh midday sun
- Low humidity with a dry stretch before and after
- No heavy wind blowing dust and debris onto wet stain
If your deck gets full sun all day, work early in the morning or later in the afternoon. A small scheduling change that makes a big difference.
Tip 2: Clean the Deck Thoroughly

Cleaning is the step everyone want to skip, and it’s the one that matter most. Dirt mildew and old gray weathered fiber block stain from absorbing.
Start by sweeping off loose debris, then clear gap between board. A putty knife works well for the stuff packed in there. Next, use dedicated deck cleaner. Look for one made for your wood type, and follow the dilution instructions on the label.
If you are using a washer, be careful. This is where beginner do real damage. Too much pressure damage the wood and leave fuzzy splintery patch. Use a wide fan tip keep nozzle at safe distance and move with the grain. Many professional stay under about 1,500 PSI for softer wood like cedar pine.
If your deck has gone silvery gray a wood brightener helps.
Let It Dry Completely
This is the part I got wrong on that first deck. After cleaning, the wood needs time to dry. Usually that’s 24 to 48 hours of dry weather, and longer for thick or shaded boards.
A moisture meter is a cheap tool that takes the guesswork out. Many manufacturer recommend staining when moisture content below roughly 12 to 15 percent. No meter? Sprinkle a little water on board. If it soak in quickly the wood is ready. If it beads up wait longer.
Tip 3: Repair and Sand Before You Stain
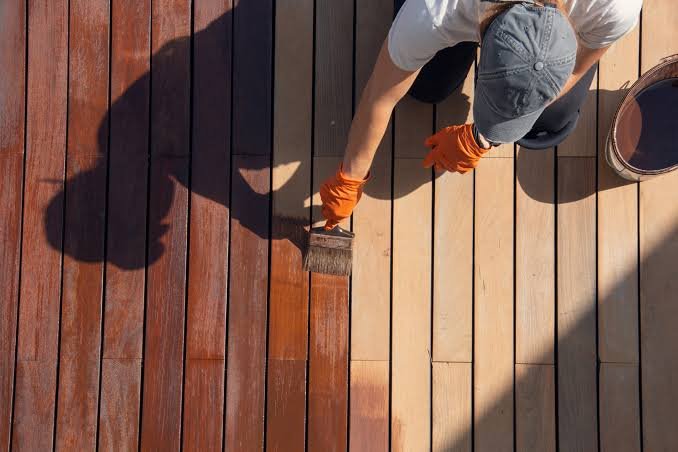
Once the deck is clean and dry walk it slowly and look for problem. Stain makes a deck look better, but it won’t hide damage. It tends to highlight it.
Check for:
- Loose or popped nails and screws. Drive them in or replace them with deck screws.
- Rotting or soft boards. Press a screwdriver into suspicious spots. If it sinks in easily, that needs replacing.
- Splinters and rough patches that will snag bare feet.
- Old finish that’s peeling or flaking in patches.
Then sand. I know nobody loves sanding but it open up the wood grain so stain absorb evenly. For most decks, 60 to 80 grit sandpaper does the job. Go with the grain never across it. Don’t go finer than about 80 grit on decking, because ultra smooth wood absorbs stain poorly.
A pole sander save your back on large surfaces. For railing and spindles use sanding sponge small detail sander. After sanding sweep vacuum all the dust. Dust left behind turns into gritty mess under fresh stain.
Tip 4: Choose the Right Type of Stain
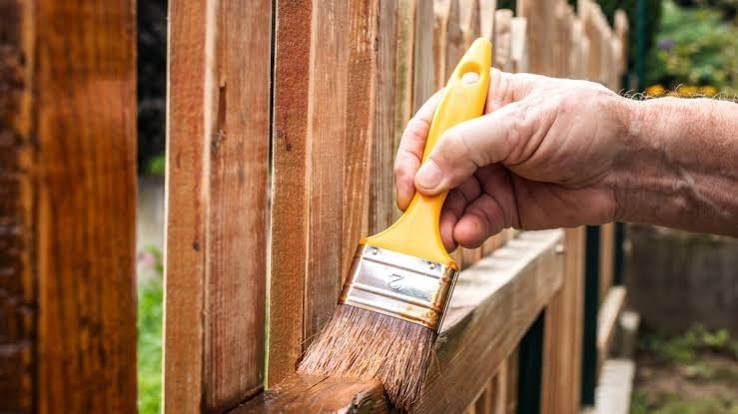
Walking into hardware store and facing a wall of stain cans is overwhelming. Let me break it down in plain term.
Transparency Levels
- Transparent or clear: Shows the most natural wood grain but offer the least UV protection. It needs reapplying more often.
- Semi-transparent: A good middle ground. It adds color while still showing the grain and it’s my usual pick for newer decks.
- Semi-solid: More pigment and more protection with less visible grain.
- Solid: Looks almost like paint. It hide imperfection on older deck but it can peel and is harder to redo later.
Oil-Based vs. Water Based
Oil based stain tend to penetrate deeply bring out rich color. They are forgiving to apply but they dry slower and have stronger fumes.
Water based stains dry faster clean up with soap and water. Modern formula have improved a lot and I’ve gotten solid results from them. Check the label for your wood type and climate.
If your deck is made of pressure treated lumber, there’s a catch. It often holds a lot of moisture when new so you may need to let it dry for several weeks, sometimes months before staining. The water sprinkle test from earlier helps here too.
Tip 5: Always Test in a Hidden Spot
Here’s a tip I wish I’d followed years ago. Stain look different on every kind of wood and it look different from color chip on the can. Cedar pine redwood composite wood blend all take color differently.
Pick hidden spot like underside of board edge near the stair scrap piece from the same lumber.
I once picked a warm chestnut that turned out orange on a pine deck. Luckily I would tested it on a spare board first so I swapped to another shade before committing. That ten-minute test saved me from redoing an entire deck.It’s also a good chance to check absorption. If the stain soaks in evenly you are in good shape. If it pool or looks blotchy you may need more sanding or wood conditioner for softer wood.
Tip 6: Apply the Stain the Right Way
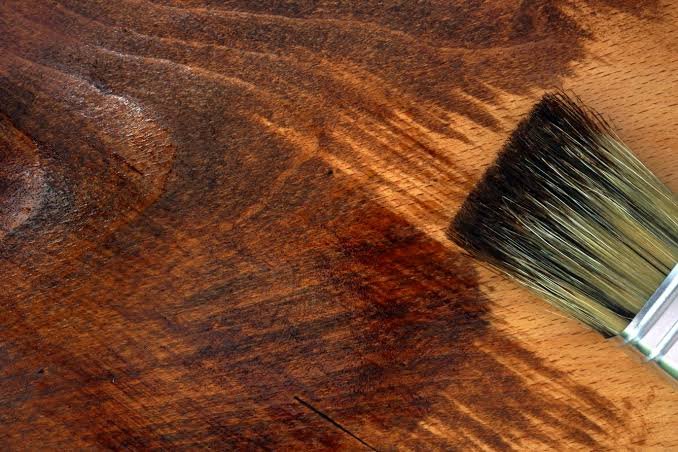
Now for the satisfying part. Stir the can well since pigment settles at the bottom. If you’re using more than one can, mix them together in a larger bucket first, a trick called boxing. It keep color consistent across the whole deck.
Start with the railings and vertical surfaces then move to the floor boards. That way drips from above won’t land on finished work. Use quality brush, pad or roller depending on the surface. Brushes push stain into grain and are great for edges and tight gap. Pads and roller speed up open areas.
Work in small section aout three or four board at a time and always follow the grain. Keep a wet edge, meaning each new stroke overlaps a section that’s still wet. That prevents ugly lap marks.
Thin Coats Win
This is the big one. Don’t flood the wood. A thick coat won’t absorb, so it dries tacky and peels. Apply a thin, even coat, then wipe away any excess that hasn’t soaked in after about 15 to 30 minutes, or whatever the label says.
Many stains work best with one good coat. Some call for two, usually applied wet-on-wet, where the second coat goes on before the first fully dries. Follow your products instruction rather than guessing.
Tip 7: Let It Cure and Plan Your Maintenance
You’re done, but the job is not quite over. Drying and curing are different.Deck may feel dry in a day but the finish can take several days to fully cure.
Keep foot traffic off for at least 24 to 48 hour and wait even longer before putting furniture and rug back. Rugs and planter trap moisture can leave mark on soft finish. Keep pets away too because paw print in tacky stain are heartbreaking.
Then think long term. A stained deck isn’t “set it and forget it.” Here’s a simple routine that has worked for me:
- Sweep regularly to keep debris from holding moisture
- Wash gently once or twice a year
- Do a water test every year. If water soaks in rather than beading, it’s time to restain
- Touch up high traffic areas before they wear through
Most semi transparent stains need a fresh coat every two to three year depending on sun and weather. Doing small regular maintenance is far easier than stripping a neglected deck.
Common Deck Staining Mistakes
After a few seasons, I’ve seen the same errors over and over. Here are the biggest:
- Staining damp wood. Moisture gets trapped and the finish fails early.
- Skipping the cleaner. Mildew spores under the stain just keep growing.
- Over-applying. Thick coats stay sticky and peel.
- Working in direct sun. Fast drying causes streaks and lap marks.
- Ignoring the old finish. New stain won’t bond properly over flaking product.
- Not testing first. Surprise colors are rarely good colors.
If you’re nodding at any of these, don’t feel bad. I’ve made nearly every one myself, and it’s how I learned.
Benefits and Drawbacks of Staining
Let’s be balanced. Staining isn’t perfect for everyone.
On the plus side stain protects wood from moisture and UV damage, helps resist rot and keeps the natural grain visible. It’s also cheaper than replacing boards, and a fresh finish boost curb appeal.
On the downside, it takes time and regular upkeep. Done badly, it looks worse than leaving the wood alone. And if you hate maintenance, a composite deck might suit you better, though it has its own cost and care considerations.
For most homeowners with a wood deck, though, regular staining is well worth the effort. A few weekends of work every couple of years can add many years of life to the boards.
Where Deck Staining Is Heading
Products keep improving. Water based stains are catching up to oil in performance, and low-VOC formulas are becoming more common as people look for friendlier options for their families and gardens. Many brands now offer stains with built in mildew resistance and better UV blockers which helps decks in sunny climates.
Tools are getting easier too. Cheap moisture meter better pads and improved applicators make it simpler for first timers to get professional-looking results.
Final Thought
If you remember nothing else remember this patience beat speed. Clean well let wood dry test your color and apply thin coat. Do that and your deck will reward you for years.
My first deck was a disaster, but it taught me more than any success could have. The second one, stained properly, still looks great. If I can go from peeling mess to proud weekend project, so can you. Take your time enjoy the process, and grab a cold drink when you’re done. You’ve earned it.
FAQs
1. How long should I wait to stain new deck?
It depends on the wood. Kiln dried lumber is usually ready within a few weeks, but pressure treated board can take anywhere from a few weeks to a few months to dry out. The easiest way to check is to sprinkle some water on the surface. If it soaks in quickly, you’re good to go. If it bead up give it more time.
2. How often should I restain my deck?
With a semi transparent stain you can usually count on two to three year though sun rain and foot traffic can shorten that. Do the water test once a year. If the water soak in instead of beading it’s time to clean the deck and put on a fresh coat.
3. Can I stain over old stain?
Sometimes. If the old finish is in good shape and is the same type of stain a thorough cleaning and new coat will often do the job. If it is peeling or flaking, you’ll have to strip or sand it back first. Staining over a failing finish usually just mean it start peeling again before long.